
Connect Discord Server
📋 Before You Jump In: Make sure you've completed the previous guide: Install the App
Time to connect your Discord server to Jira and enable your first project. This is a two-step process:
- Connect Discord server instance-wide to your Jira site
- Enable specific Jira projects to use the connected Discord server
We'll have you chatting with your team in no time!
Step 1: Connect Your Discord Server
First, let's connect your Discord server to your entire Jira instance.
A Jira administrator must add or reconnect the Jiri bot. Project administration alone is not enough for this site-wide action. If project settings show Jira administrator required, ask a Jira administrator to connect the bot; you can then enable and configure your project with your existing project permissions. Setup Guide remains available in that state.
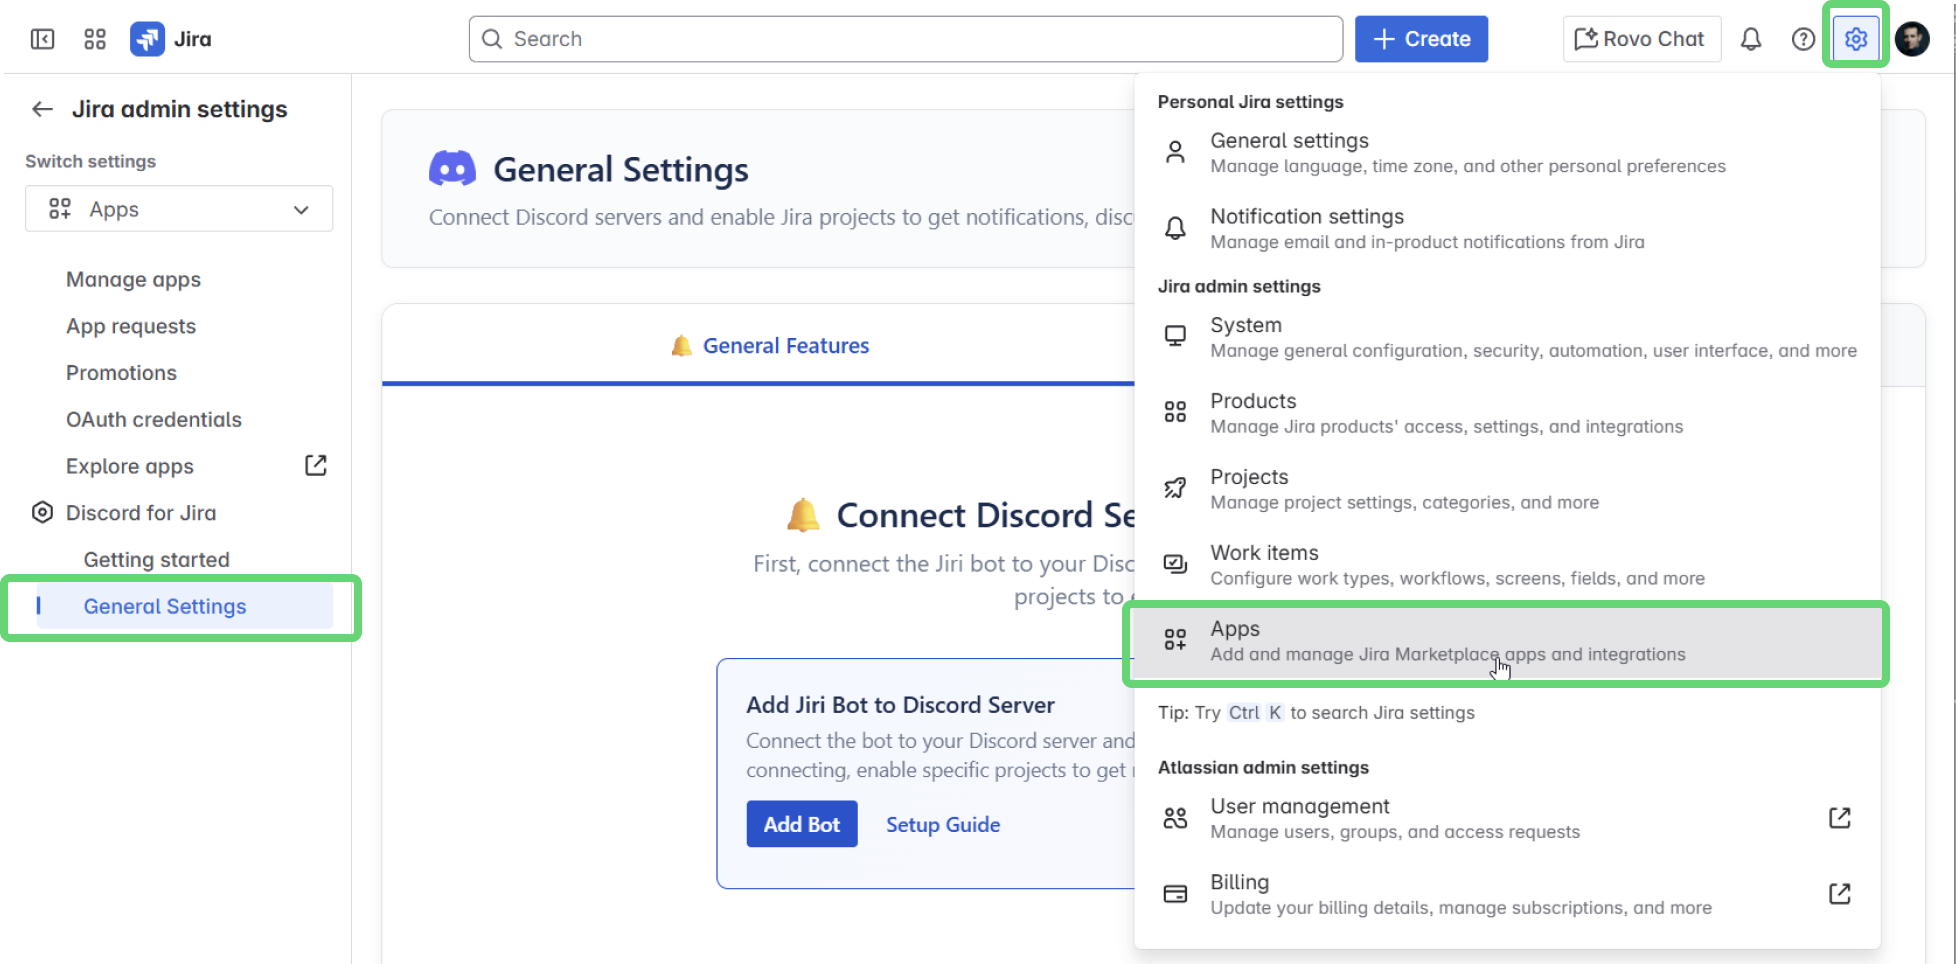
- Navigate to General Settings:
- Click the Settings gear icon in your Jira header
- Select Apps from the menu
- Under Discord for Jira, click General Settings
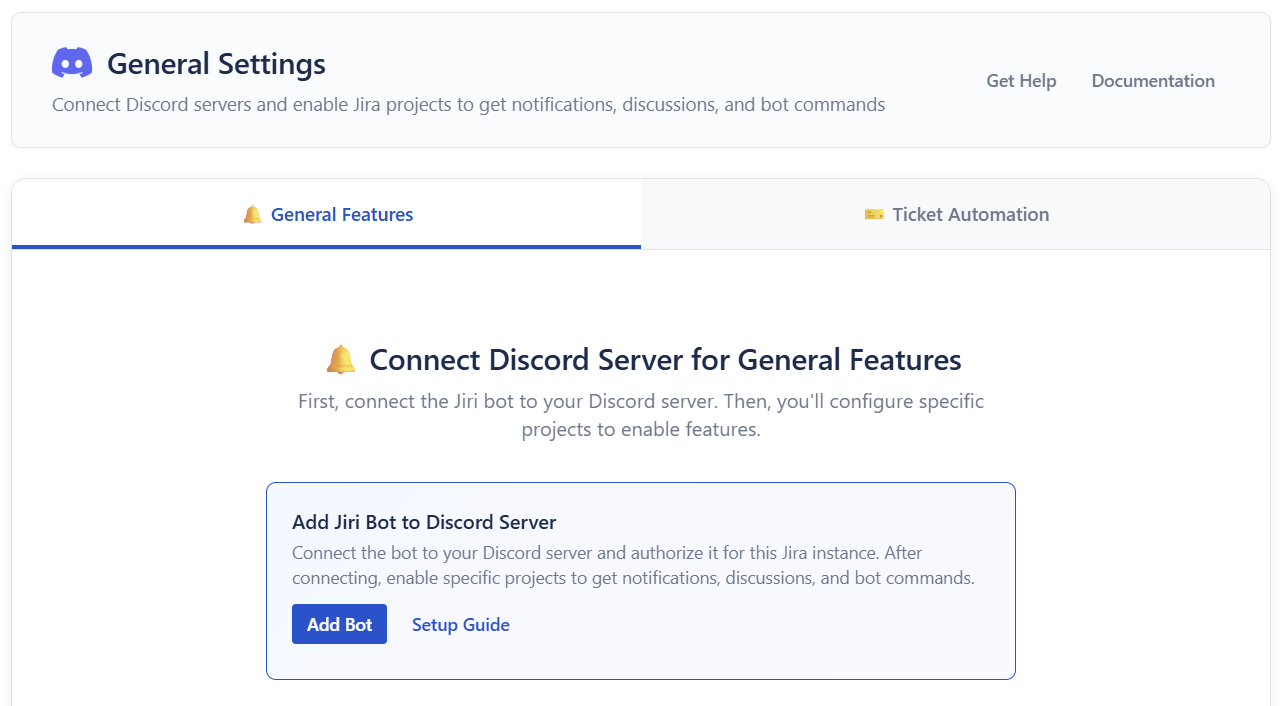
- Add Jiri Bot to Your Discord Server:
- Click Add to Discord to start the connection process
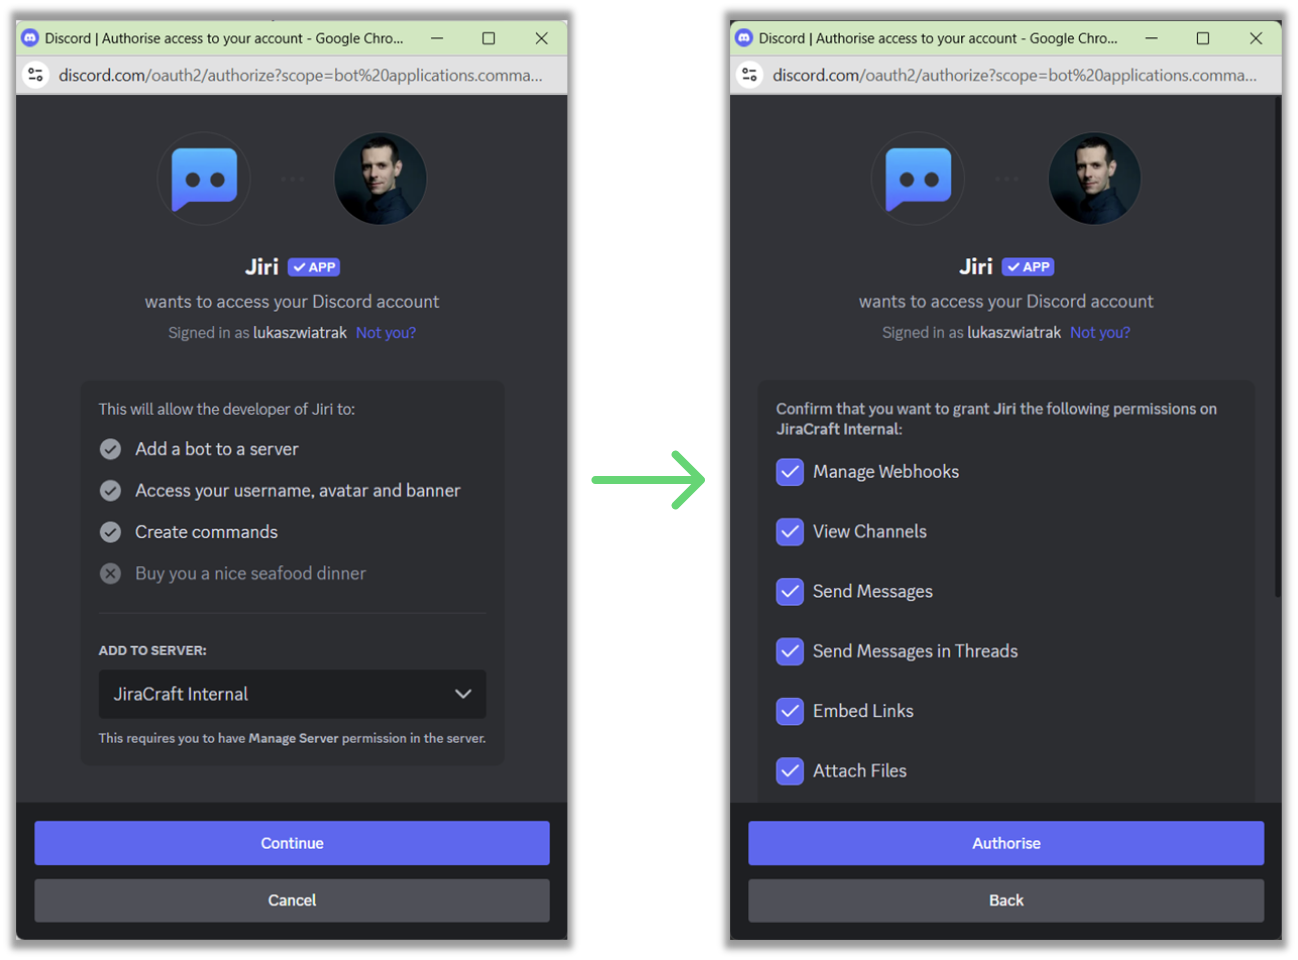
- Authorize Jiri in Discord:
- You'll be redirected to Discord to authorize the bot
- Select your Discord server from the dropdown
- Click Authorize to grant the necessary permissions
💡 Quick tip: Jiri needs permissions like sending messages and managing threads to work properly - all standard stuff!
- Confirm Connection:
- Return to Jira - your Discord server should now appear in the connected servers list
- Success! Your server is now available across all Jira projects
Step 2: Enable Your First Project
Now let's enable a specific Jira project to use your connected Discord server.
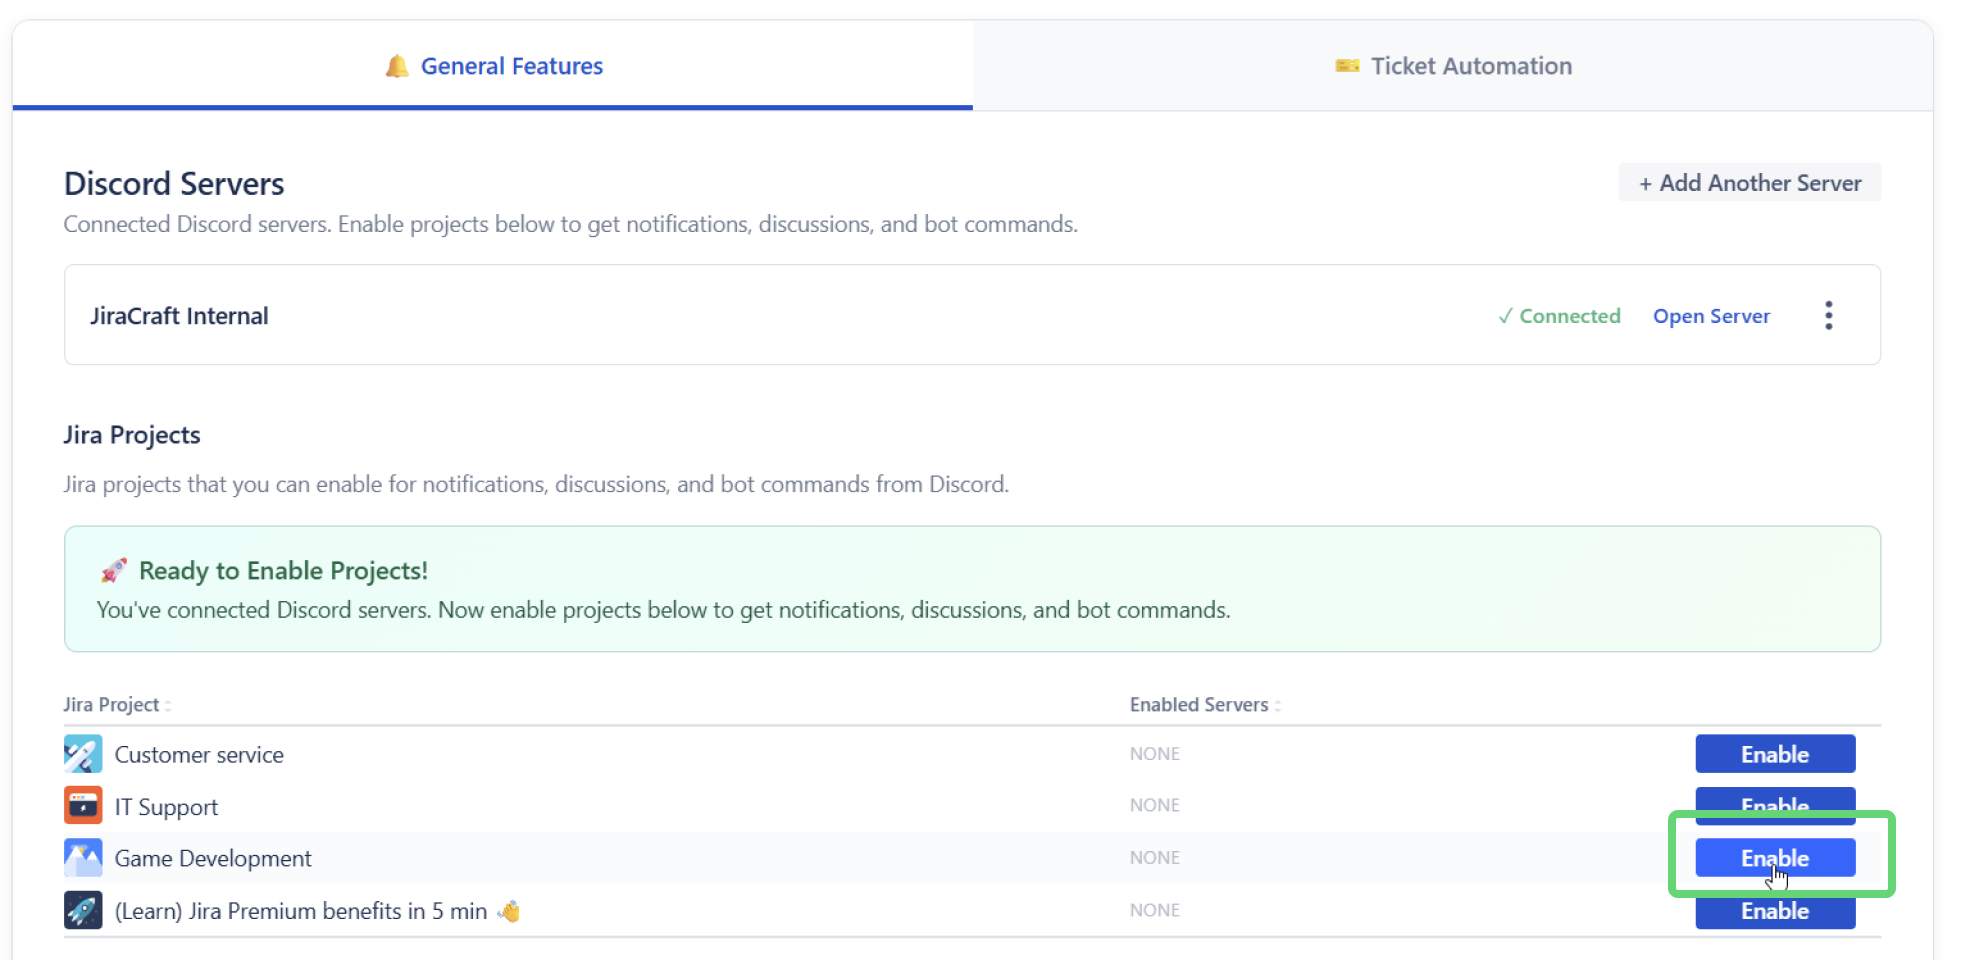
- Choose Projects to Enable:
- In General Settings, scroll down to Jira Projects
- Find the project you want to connect and click Enable
- Select which Discord servers to enable for this project
💡 Pro tip: You can also enable projects individually by going to each project's settings, but doing it from General Settings gives you a nice overview of everything.
Only Jira admins can access Global Settings. If you do not see the "Manage Discord servers" shortcut in a project, ask a Jira admin to open Global Settings.
Quick Troubleshooting
Changed your Jira project key? When Jira sends the project update, Discord for Jira updates the project's server connections, ticket configurations, and project-specific notification rules using the previous keys Jira still associates with that project. You do not need to recreate those settings. Custom JQL filters and notification templates keep the text you entered; review any references to the old key, especially before releasing a previous key for reuse.
🤔 Don't see your Discord server during authorization? Double-check you're logged into the correct Discord account and have "Manage Server" permissions.
🤔 Can't find General Settings? Make sure you have Jira admin rights - only admins can manage Discord server connections.
Still stuck? Drop by our Discord for Jira Community - we love helping out!
Enabling Additional Projects
💡 Need to enable more projects? You can enable as many Jira projects as you want to use with Discord:
- Go back to General Settings → Jira Projects
- Click Enable for each project you want to connect
- Each project can use any of your connected Discord servers
You can also enable projects individually from each project's settings under Project Settings → Apps → Discord.
What's Next?
Great work! Your Discord server is connected and your first project is enabled. Now you can:
- Configure First Notifications - Set up your first notification rules
- Ticket Automation Guide - Create and manage Service Desk tickets from Discord
Time for a celebratory coffee! ☕️